Contents
This guide focuses on how the app behaves in practice—scan, verify, track changes, then export when you’re ready.
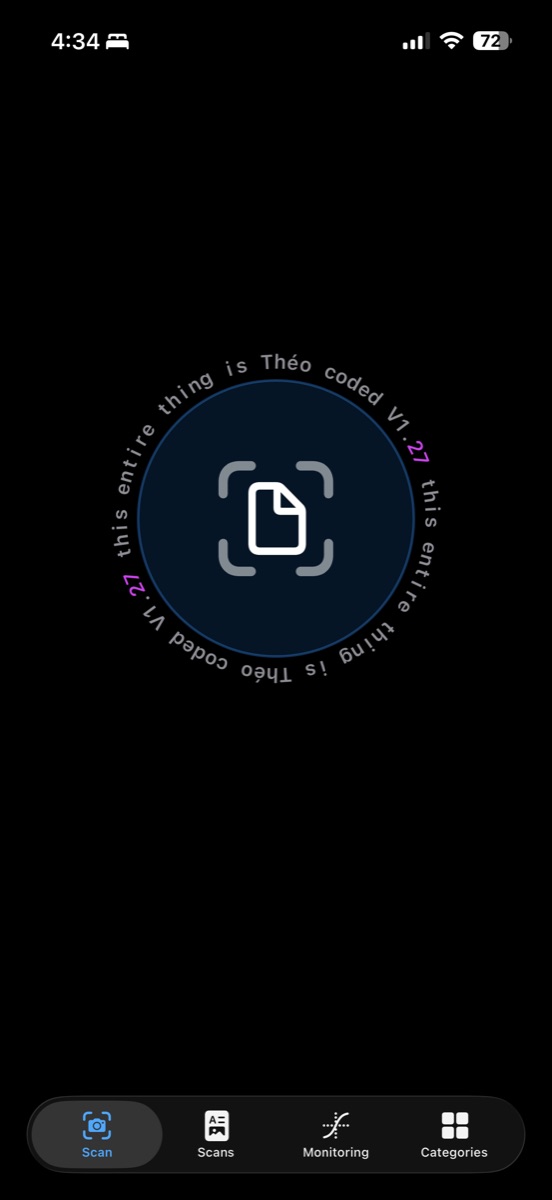
The Scanning Process
Now let’s walk through the scanning process. When I launch the app and tap the scan button, the app will prompt me to allow access to the camera. Camera access is required to proceed. To get the best results, place the document on a contrasting surface, such as a white sheet of paper on a black table, and make sure you have adequate lighting. Hold the phone about twelve inches above a standard sheet of printer paper.
The automated scan will handle focus, border detection, scaling, and image capture. All you need to do is hold your hand steady for roughly three seconds. The app takes multiple frames and uses machine learning to enhance the document in ways that aren’t possible with a single manual photo. This significantly improves accuracy and is why the automated scan is recommended over the manual option.
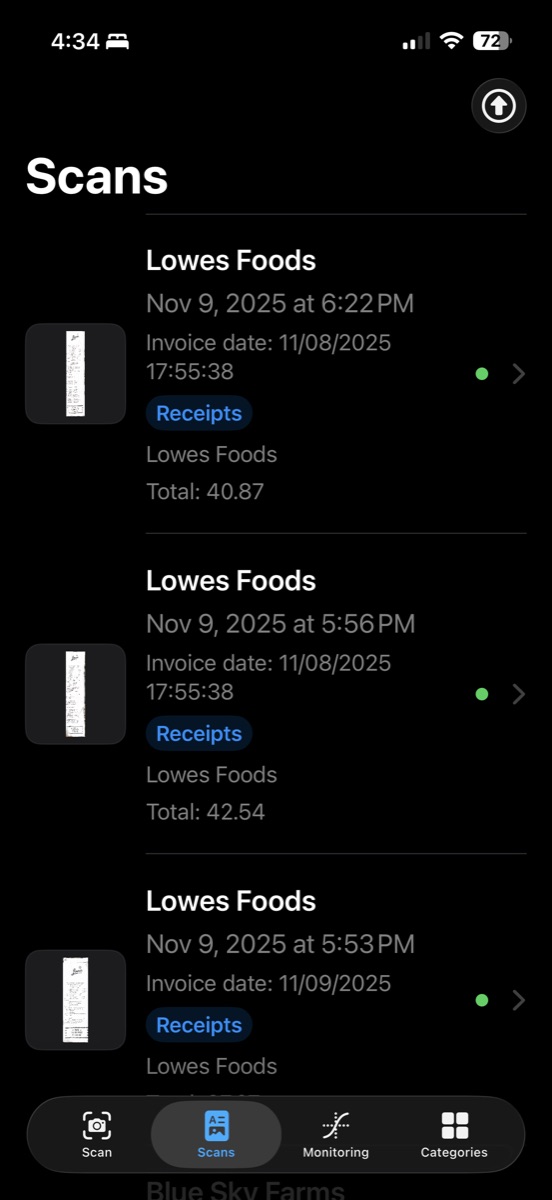
Once the scan is complete, tap the checkmark in the top-right corner. This will bring you to the Scans page. You can take as many scans as you want, and we recommend scanning all of your documents in one session if possible. A good workflow is to scan everything first, then place your phone on the table with the app open and let it process. Depending on your connection, each scan can take one to two minutes. This processing time ensures accuracy, as multiple models are run and compared. Once the model is confident, it green-lights the result and moves on to the next item in the queue.
If you have a large batch, such as twenty-five or thirty documents, scan them all first and make sure your phone does not turn off automatically. If the phone locks, you leave the app, or the connection is lost, the scan may fail and return a network error associated with that scan.
Viewing a Scan
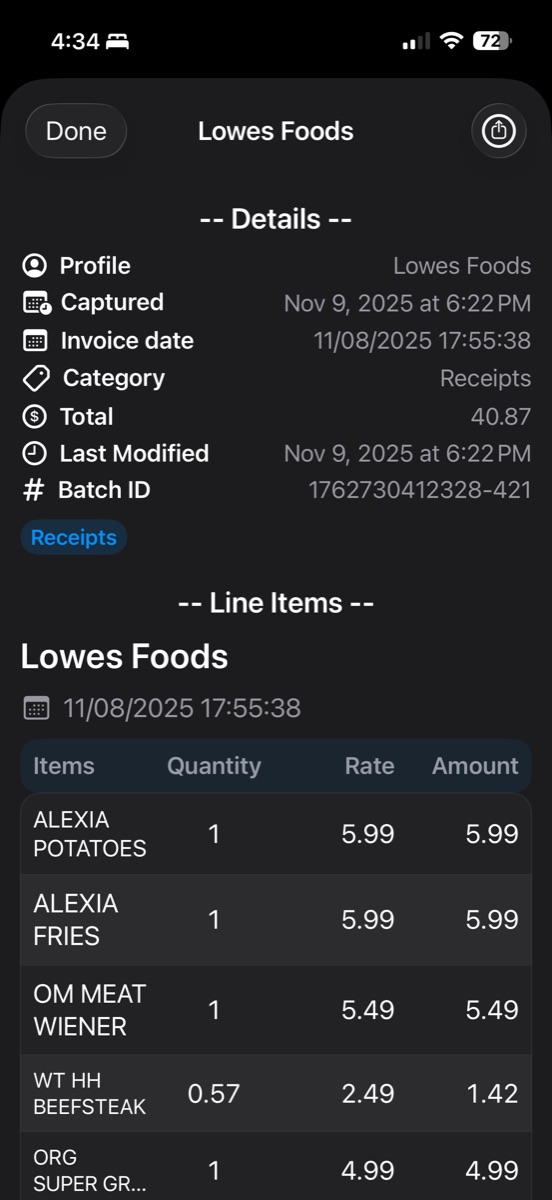
When a scan finishes processing, you can tap it in the Scans section to view its details. Each scan includes a profile, which is essentially the title or business name associated with the invoice or receipt. This is whatever the model determines to be the unique identifier of the document, and it tends to be very consistent. You’ll also see the capture date, which is when you scanned the document, and the invoice date, which is extracted from the document itself if present.
The scan also shows the assigned category, the total value of the invoice or receipt, and the last modified date. Each scan is assigned a batch ID, which is a unique identifier for that specific invoice. Since every line item is parsed individually, the batch ID makes it easier to reconstruct a specific invoice later in a spreadsheet. The batch ID is generated using a random numeric value combined with the date and time of capture, ensuring no two batches are the same. Even multiple scans taken in quick succession will have different batch IDs.
Below that, you’ll see inline items, which is a small spreadsheet-style preview showing item names, quantities, rates, and amounts. You can rotate your phone to landscape mode for a better view. There’s also the original scan image for reference, a CSV preview showing the raw data, and a model output section used primarily for testing. There’s also a share button that formats the entire scan into a CSV file so it can be easily shared.
Bulk Export
Back in the Scans section, there’s an arrow button in the top-right corner. Tapping this opens a bulk export viewer where you can select multiple scans. There’s a settings panel that lets you control the order and fields included in the CSV, along with options to select all or clear your selection. Tapping the blue export arrow generates a master CSV containing all selected scans, each with its batch ID. This makes it easy to reconstruct individual invoices later if needed. You can also view where the exported file was saved.
Monitoring
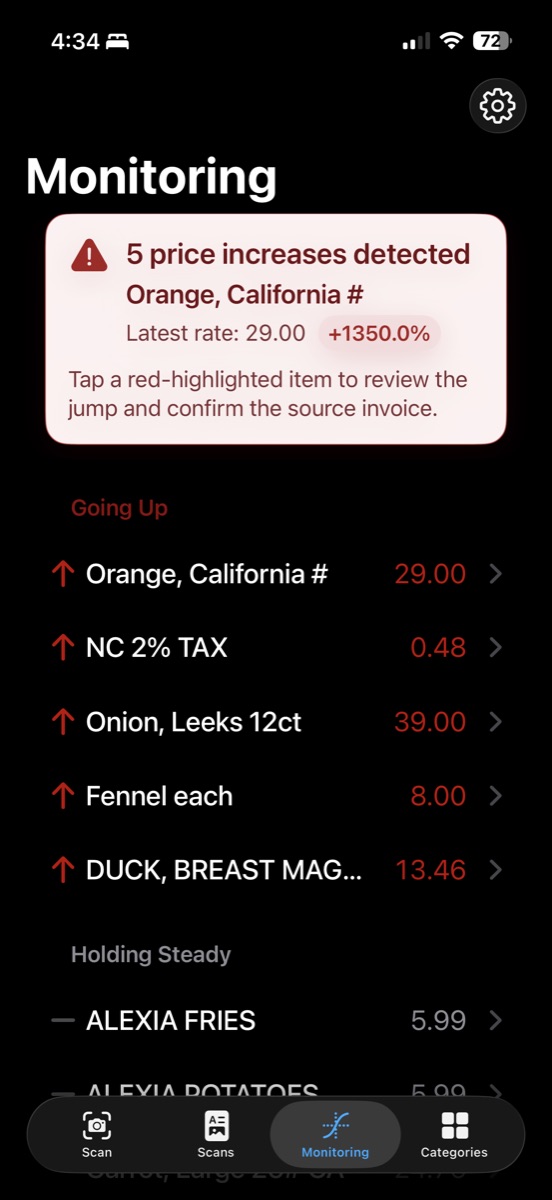
Moving on to Monitoring, this section shows a long list of every individual item you’ve scanned across all documents. Tapping an item shows how many times it has appeared. Tapping again highlights where that item appears within a specific scan and takes you directly to it for quick reference.
Monitoring items are grouped into four sections. “Going up” includes items that have increased in price and are highlighted in red with an upward arrow. “Holding steady” includes items that have not changed in value. “Going down” includes items that have decreased in price. “Newly tracked” includes items with only one data point, meaning there isn’t enough information yet to establish a trend.
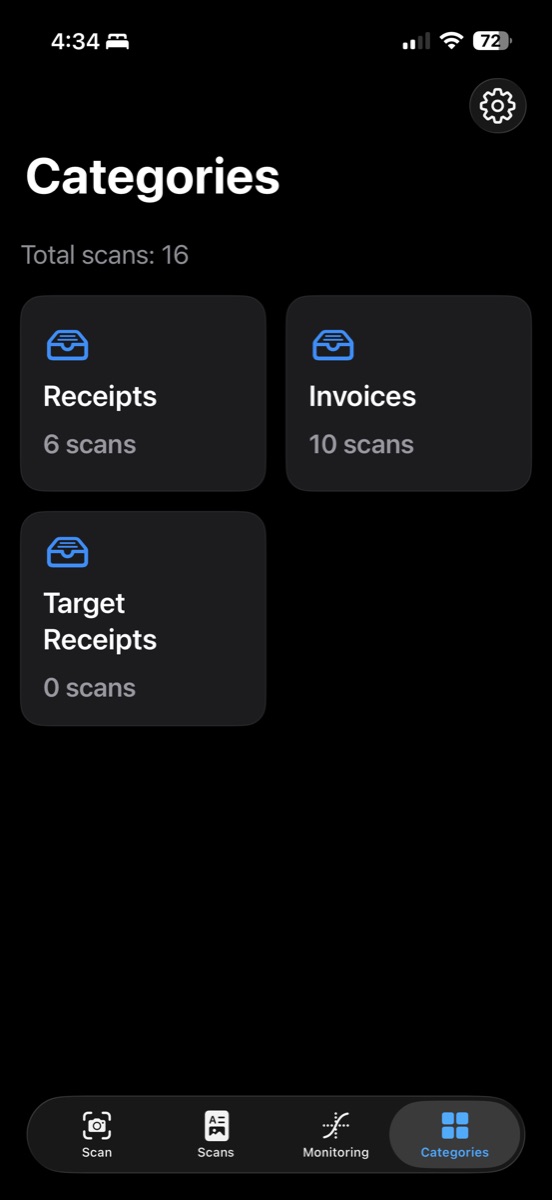
Categories
The Categories section allows you to view scans grouped by category. For example, if you select the Invoices category, you’ll see all documents the model has identified as invoices. You can export all documents within a category into a CSV file. While this export option is not as advanced as the bulk scan export, it’s a fast way to export all documents of a specific type, such as receipts.
Exports
Once exported, the CSV files can be opened in tools like Excel or Google Sheets. You can also upload them to large language models like OpenAI’s ChatGPT or Google’s Gemini to perform analysis, generate charts, identify trends, and more. CSV is the standard format for exchanging and manipulating structured data.
iCloud
Finally, the entire application is backed by Apple iCloud. When you install and run the app, it automatically creates an iCloud folder. This folder stores everything you’ve ever scanned, including images, metadata, and CSV files. The app also includes microtransactions, which are still to be determined.